7/29/2016

Matte Black, Red & White Rose Nail Art With Polka Dot Design


Hello Everyone!

Today I share again a matte nail art.
This is a black, red and white rose nail art with polka dot design.

Hope you'll like this elegant nail idea.

Let's do it!


1. Apply base coat to protect your natural nails from hard discoloration,

2. Paint your nails:

Red: ring and thumb nails,
Black: index and little nails,
White: middle nail:


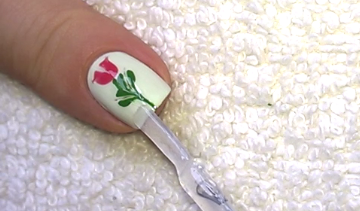
3. Make nice edge with a nail art brush ans nail polish remover:


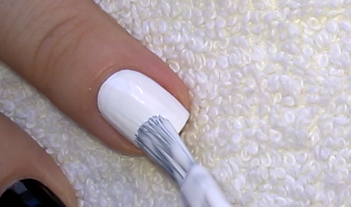
4. We need to paint a second layer on each nail:


5. For the rose design we need a thin nail art brush and black nail polish (the thumb nail has the same rose pattern):


6. Over the other nails I paint polka dot design by using a small dotting tool:


7. Finally may come the matte top coat:


That's it! We're done.


What I use:

1. Essence Ultra Nail Repair base coat,

2. Essence white nail polish,

3. MaxFactor red nail polish,

4. Catrice black nail polish,

5. Lovely Matte top coat,

6. A thin nail art brush,

7. A small dotting tool.


Thanks for stopping by my blog!

Come and join me,
Welcome to my:

YouTube: https://www.youtube.com/user/LifeWorldWomen

Feel free to ask me anything you'd like to know!

Facebook: https://facebook.com/lifeworldwomen
Twitter: https://twitter.com/LWWEasyNailArt

Pinterest: http://www.pinterest.com/ildikomohos/

Music by Kevin MacLeod /Dream Culture/
https://incompetech.com/music/royalty-free/

Licensed under Creative Commons: By Attribution


7/27/2016

Pastel Matte Tape Nail Art Idea


Hello Everyone!

Today's nail art is a matte pastel tape nail design.

Let me show you how to do this soft nail art!


1. Apply base coat to protect your natural nails from hard discoloration,

2. Fix 'V' shape tapes over your nails and paint them with pastel colors... I use pastel green, yellow, blue, lavender pink and peach, or rather apricot :)) :


3. Slowly remove the tape:


4. Today I don't know how but the edges have been so messy, so I had to fix them with nail art brush and nail polish remover:


5. I put a medium and a small white dot over each nail:


This nail art is really nice with shiny top coat too but I used matte top coat for this design:


You see here what colors I used on my nails... the thumb is the peach or rather apricot :)) :


We're done!


What I use:

1. Essence Ultra Nail Repair base coat,

2. Essence white, pastel blue nail polishes,

3. Essence Colour&Care pastel green, yellow and lavender pink polishes,

4. Rimmel Salon Pro peach nail polish,

5. Lovely Matte To coat,

6. 'V' shape tapes and dotting tool.


Thank you so much for stopping by my blog!

Come and join me:
Welcome to my:  https://www.youtube.com/user/LifeWorldWomen

Feel free to ask me anything you'd like to know!

Facebook: https://facebook.com/lifeworldwomen
Twitter: https://twitter.com/LWWEasyNailArt

Pinterest: http://www.pinterest.com/ildikomohos/

Music by Kevin MacLeod /Life Of Riley/
http://incompetech.com/music/royalty-free/

Licensed under Creative Commons: By Attribution


7/25/2016

Drag Marble Flower Nail Art Using Toothpick


Hello Everyone!

Today I share a drag marble flower nail design using only a toothpick.

Let's start it!


1. Apply base coat to protect your natural nails from hard discoloration,

2. Paint one of your nails mint green - One, because we need wet nail polish:


3. Put a pink and two green blobs over the wet base:


4. By a toothpick make the flower and the leaves:


5. Still we need to paint stalk:


6. The thumb nail is pink with mint polka dot design:


7. Finally apply top coat to protect the manicure from peeling and to keep it shiny and glossy:


That's it! We're done.


What I use:

1. Essence base coat,

2. Essence mint green nail polish,

3. Rimmel Salon Pro pink nail polish,

4. Essence green nail polish,

5. Sally Hansen Double Duty base&top coat,

6. Toothpick.


Thanks for stopping by my blog!

Come and join me,
Welcome to my:

YouTube: https://www.youtube.com/user/LifeWorldWomen

Feel free to ask me anything you'd like to know!

Facebook: https://facebook.com/lifeworldwomen
Twitter: https://twitter.com/LWWEasyNailArt

Pinterest: http://www.pinterest.com/ildikomohos/

Music by Kevin MacLeod /Clear Waters/
https://incompetech.com/music/royalty-free/

Licensed under Creative Commons: By Attribution


7/22/2016

Ikat Inspired Toothpick Nail Art


Hello Everyone!

In this day I show you a no special tool needed ikat inspired toothpick nail art.

I don't paint so much grey design, so I used grey base for now.

Let's do it!


1. Apply base coat to protect your natural nails from hard discoloration,

2. Paint your nails grey then let them dry:


3. For the pattern I use a toothpick, black, pink and light grey nail polishes... I start it with thhe black polish:


4. Then I apply pink next to the black:


5. I paint the middle part light grey:


6. I apply silver nail polish around the ikat-like pattern:


7. Finally may come the top coat, to protect the manicure from peeling and to keep it shiny and glossy:


That's it! We're done.


What I use:

1. Essence Ultra Nail Repair base coat,

2. Catrice black nail polish,

3. Essence grey, light grey, silver and pinkish red nail polishes,

4. Sally Hansen Double Duty base&top coat,

5. Toothpick.


Thanks for stopping by blog!

Come and join me,
Welcome to my:

YouTube: https://www.youtube.com/user/LifeWorldWomen

Feel free to ask me anything you'd like to know!

Facebook: https://facebook.com/lifeworldwomen
Twitter: https://twitter.com/LWWEasyNailArt

Pinterest: http://www.pinterest.com/ildikomohos/

Music by Kevin MacLeod /Double Drift/
https://incompetech.com/music/royalty-free/

Licensed under Creative Commons: By Attribution


7/20/2016

Pinky Drag Marble Nail Art Using Needle


Hello Everyone! :)

Today I decided to make a pinky drag marble nail art using a single needle.

Hope that you'll like this easy design.

Let's start it!


1. Apply base coat,

2. Paint one of your nails white - One, because we need wet nail polish:


3. Put a pink blob in the middle, then a baby pink and a light lavender pink blob:


4. Grab a needle and start to drag it across the blobs:


5. Finish the nail art with top coat, to protect the manicure from peeling and to keep it shiny and glossy:


That's it! We're done.


What I use:

1. Essence Ultra Nail Repair base coat,

2. Essence white nail polish,

3. Rimmel Salon Pro pink and baby pink nail polishes,

4. Essence lavender pink nail polish,

5. Sally Hansen Double Duty base&top coat,

6. A needle.


Thanks alot for stopping by my blog!

Come and join me,
Welcome to my:

YouTube: https://www.youtube.com/user/LifeWorldWomen

Feel free to ask me anything you'd like to know!

Facebook: https://facebook.com/lifeworldwomen
Twitter: https://twitter.com/LWWEasyNailArt

Pinterest: http://www.pinterest.com/ildikomohos/

Music by Kevin MacLeod /Continue Life/
https://incompetech.com/music/royalty-free/

Licensed under Creative Commons: By Attribution


7/18/2016

Matte Dark Blue Rose Nail Art Design Using Acrylic Paint


Hello Everyone!

Today I share a matte dark blue based rose nail art using acrylic paint.

Let's start it!


1. Apply base coat to protect your natural nails from hard discoloration,

2. Paint your nails dark blue - I use velvet matte nail polish,

3. I start the floral pattern with the leaves, by light green and a thin nail art brush:


Paint a stalk in the middle:


4. Needed some dark green shades:


5. for the roses we need baby pink and burgundy acrylic paints:


6. Finally put some small white point over the stalk:


7. At the end apply matte top coat:


That's it! We're done.


What I use:

1. Essence Ultra Nail Repair base coat,

2. Rimmel Velvet Matte dark blue nail polish,

3. Moyra acrylic paints: baby pink, burgundy, green, light green, white,

4. Lovely matte top coat,

5. A thin nail art brush.


Thanks alot for stopping by my blog!

Come and join me,
Welcome to my:

YouTube: https://www.youtube.com/user/LifeWorldWomen

Feel free to ask me anything you'd like to know!

Facebook: https://facebook.com/lifeworldwomen
Twitter: https://twitter.com/LWWEasyNailArt

Pinterest: http://www.pinterest.com/ildikomohos/

Music by Kevin MacLeod /Anamalie/
http://incompetech.com/music/royalty-free/

Licensed under Creative Commons: By Attribution


7/15/2016

Summery Dotting Tool Side Nail Art Design


Hello Everyone!

This nail art is a colorful summery design, a side dotticure nail art.

Really easy to do even for beginners.

Let's start it!


1. Apply base coat to protect your natural nails from hard discoloration,

2. For the pattern we need:

- a medium dotting tool,
- black,
- purple,
- pastel purple,
- orange,
- pink and peach nail polishes.

We start the design with the black in diagonally shape:


Wait some minutes between two colors to avoid the smudging.


The peach is the last color, but there is still empty space, so I use the purple again - if you have more space then use the black polish too...


3. Finally apply top coat to protect the manicure from peeling and to keep it shiny and glossy:


That's it! We're done.


What I use:

1. Essence base coat,

2. Catrice black nail polish,

3. Miss Sporty purple and pastel purple nail polishes,

4. Essence orange nail polish,

5. Rimmel pink and peach nail polishes,

6. Sally Hansen Double Duty base&top coat,

7. Dotting tool.


Thanks for reading my blog!

Come and join me,
Welcome to my:

YouTube: https://www.youtube.com/user/LifeWorldWomen

Feel free to ask me anything you'd like to know!

Facebook: https://facebook.com/lifeworldwomen
Twitter: https://twitter.com/LWWEasyNailArt

Pinterest: http://www.pinterest.com/ildikomohos/

Music by Kevin MacLeod /Summer Day/
https://incompetech.com/music/royalty-free/

Licensed under Creative Commons: By Attribution