10/26/2015

Halloween Nail Ideas / Black Cat Tip, Tree & 'Eyes' Designs


Hi Guys!

I'm bringing today some more nail ideas for Halloween. It includes black negative space 'eyes' design, black cat tip, tree nail design.

Let's begin these nail designs!


1. Apply base coat to protect your natural nails from discoloration,

2. Paint the middle- and ring finger nails light blue - it's like greyish blue,

3. The thumb-, index- and little finger nails have black negative space design with eyes:


4. Over the ring finger nail I paint a black cat - I use liner polish for the tail and ears but a nail brush is perfect too:


5. The middle finger nail gets a cloudy tree design with moon, but I didn't choose dark base color:

- For the moon grab a big headed dotting tool and white polish:


- We need for the clouds a small drop of black nail polish and base coat then by a brush mix them up:

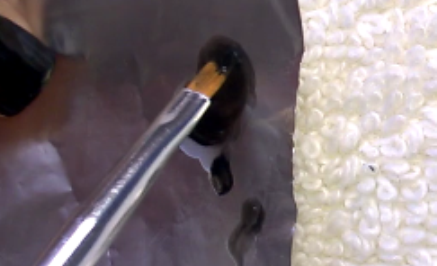


6. By using black liner polish I paint the tree:


7. Finally finish the designs with top coat.

We're done!

Feel free to share your opinion! Even if you have nail art requests please share too :)


What I use:

1. Essence base coat,

2. Lovely black nail polish,

3. Catrice light blue nail polish,

4. Essence white polish,

5. ADEN black liner polish,

6. Essence QuickDry top coat,

7. Dotting tools.


Thanks for reading my blog!

Join me... Welcome to my:

YouTube: https://www.youtube.com/user/LifeWorldWomen
Facebook: https://facebook.com/lifeworldwomen
Twitter: https://twitter.com/LWWEasyNailArt
Pinterest: http://www.pinterest.com/ildikomohos/

Music by Kevin MacLeod /Dama-May/
http://incompetech.com/music/royalty-free/


10/23/2015

Mix & Match Pinks! Another Easy Toothpick Nail Art


Hi Guys!

Today's nail art is a 'mix and match pinks' design using toothpick.

Let's start this super easy nail art!

1. Apply base coat to protect your natural nails from discoloration,

2. Paint your nails dark pink:


3. Wait some seconds then paint a line like the nail polish brush, grab a toothpick and draw like a spiral for making the pattern - I change the colors, I use pink and baby pink:


4. Finally apply top coat.

And.. we're done!

Hope you like it, please feel free to share your opinion.


What I use:

1. Essence base coat,

2. NYC dark pink nail polish,

3. Lovely baby pink and pink nail polishes,

4. Essence QuickDry top coat,

5. Toothpick.


Thanks for reading my blog!

Join me... Welcome to my:

YouTube: https://www.youtube.com/user/LifeWorldWomen
Facebook: https://facebook.com/lifeworldwomen
Twitter: https://twitter.com/LWWEasyNailArt
Pinterest: http://www.pinterest.com/ildikomohos/

Music by Kevin MacLeod /Continue Life/
http://incompetech.com/music/royalty-free/


10/21/2015

Brown, Beige & Purple Elegance: Fall Nail Art Design


Hi Guys!

Today I am here with a soft and elegant fall nail design in brown and purple.

Let's start it!


1. Apply base coat to protect your natural nails from discoloration,

2. Paint your nails:

- Pastel purple: thumb- and little finger nails,
- Dark beige /matte nude/: middle- and ring finger nails,
- Brown / chocolate: index finger nail,


3. I begin with the ring finger:

First I use white liner polish for the base of pattern:


For the next step I use nail brush and the brown polish plus a gold liner polish:


4. As we finished the ring finger nail may continue with the middle finger and it gets floral pattern:


I don't use top coat because of the matte nude nail polish.

We're done!

Hope you like it.. Feel free to ask me and share your opinion. Thank you!


What I use:

1. Essence base coat,

2. Crystal Nails brown nail polish,

3. Catrice pastel purple and Luxury Nudes dark beige /soft matt/ nail polishes,

4. ADEN white and gold liner polishes,

5. Dotting tool.


Thanks for reading my blog!

Come and join me... Welcome to my:

YouTube: https://www.youtube.com/user/LifeWorldWomen
Facebook: https://facebook.com/lifeworldwomen
Twitter: https://twitter.com/LWWEasyNailArt
Pinterest: http://www.pinterest.com/ildikomohos/

Music by Kevin MacLeod /Finding the Balance/
http://incompetech.com/music/royalty-free/


10/19/2015

Matte Dry Brush & Striping Tape Nail Art


Hi Guys!

Today's nail art is a matte dry brush design using striping tape.

I use dark blue /suede/, pink, light blue and yellow nail polishes; striping tape.

Let's start it!


1. Apply base coat to protect your natural nails from discoloration,

2. We now need dry brushes: pink, light blue and yellow:


3. Over the nails I don't use tape I paint plus dark blue:


4. I fix tapes over my index- and little finger nails then paint them dark blue:


5. Remove the tape:


6. Finally the matte top coat:


That's it! We're done!

Please feel free to share your opinion about my nail ideas! Thank you!! :)


What I use:

1. Essence base coat,

2. Rimmel pink and light blue nail polishes,

3. Essence pastel yellow nail polish,

4. Essence 'Suede' dark blue nail polish,

5. Lovely Matte top coat,

6. Essence striping tape.


Thanks for reading my blog!

Come and join me... Welcome to my:

YouTube: https://www.youtube.com/user/LifeWorldWomen
Facebook: https://facebook.com/lifeworldwomen
Twitter: https://twitter.com/LWWEasyNailArt
Pinterest: http://www.pinterest.com/ildikomohos/

Music by Kevin MacLeod /Dream Culture/
http://incompetech.com/music/royalty-free/


10/16/2015

Quick Toothpick Nail Art


Hi Guys!

Today I've created a super easy and quick toothpick nail design.

We need pastel pink, pink, orange, yellow nail polishes and a toothpick.

Let's start this easy nail art!


1. Apply base coat to protect your natural nails from discoloration,

2. Paint your each nail pastel pink - I applied one coat only though I knew it's not enough :)) , so apply at least two coats but it depends on the nail polish too:


3. As you paint them, put blobs over the nails - I use pink, orange and yellow nail polishes:


4. Grab a toothpick and pull it through the blobs:


5. Finally apply top coat:


That's it! We're done.

Feel free to share your opinion :)


What I use:

1. Essence base coat,

2. Astor pastel pink nail polish,

3. Lovely pink nail polish,

4. Essence pastel yellow nail polish,

5. Miss Sporty orange nail polish,

6. Essence QuickDry top coat,

7. Toothpick.


Thanks for reading my blog!

Come and join me... Welcome to my:

YouTube: https://www.youtube.com/user/LifeWorldWomen
Facebook: https://facebook.com/lifeworldwomen
Twitter: https://twitter.com/LWWEasyNailArt
Pinterest: http://www.pinterest.com/ildikomohos/

Music by Kevin MacLeod /Daily Beetle/
http://incompetech.com/music/royalty-free/


10/14/2015

Ombre Halloween Nail Art


Hi Guys!

Today's nail art is an ombre Halloween design, even I made it elegant by using sparkly polish over the burgundy nails.

So let's start this pretty design!


1 Apply base coat to protect your natural nails from discoloration,

2. Paint your nails:

- Burgundy: thumb-, index- and little finger nails,
- White: middle- and ring finger nails.

3. I use 'peel off' base coat around the white nails:


4. We now need a small makeup sponge, burgundy-dark red/pink-pink-orange nail polishes for the ombre design:


5. Make the ombre nail:


6. Clean up the skin /I use nail brush and nail polish removal too/:


7. By using black liner polish I paint crosses and some 'grass' /You may use a simple nail brush with
black polish/:


8. I paint waves over each burgundy nail by sand top coat:


9. Finally I finish it with top coat:


That's it! We're done.

Hope you'll try this pretty design out :)


What I use:

1. Essence base coat,

2. Crystal Nails burgundy nail polish,

3. Essence white nail polish,

4. Astor dark red/pink nail polish,

5. Lovely pink nail polish,

6. Maybelline orange nail polish,

7. Miss Sporty 'Peel Off' base coat,

8. Essence 'Sparkle Sand' top coat,

9. ADEN black liner polish,

10. Makeup sponge,

11. Essence QuickDry top coat.


Thanks for stopping at my blog!

Feel free to ask me anything you'd like to know.

Come and join me... Welcome to my:

YouTube: https://www.youtube.com/user/LifeWorldWomen
Facebook: https://facebook.com/lifeworldwomen
Twitter: https://twitter.com/LWWEasyNailArt
Pinterest: http://www.pinterest.com/ildikomohos/

Music by Kevin MacLeod /I Feel You/
http://incompetech.com/music/royalty-free/


10/12/2015

Red & White Halloween Nail Design - Bloody Nails


Hi Guys!

I decided to make another Halloween design which is red and white 'bloody' design.
This nail art includes in fact three designs.

Let me show you how to do them!


1. Apply base coat to protect your natural nails from discoloration,

2. We need tape and white nail polish for the teeth tips:


3. After painting the tip I remove the tape carefully:


4. I grab a nail brush and red nail polish and 'put' some blood over the teeth:


5. Let's paint the 'red nail figure' by using a big- and small headed dotting tool, liner polish, white- and black nail polish:


6. The thumb nail gets dripping design:


7. Finally apply top coat:


That's it!

You can wear these designs together or one at a time.

Hope you like them.. Let me know! :)

Feel free to share your thought, opinion and ask me anything you'd like to know.


What I use:

1. Essence base coat,

2. Lovely black, white and sparkly red nail polishes,

3. ADEN white liner polish,

4. Essence QuickDry top coat,

5. Dotting tools.


Thanks for reading my blog!

Come and join me... Welcome to my:

YouTube: https://www.youtube.com/user/LifeWorldWomen
Facebook: https://facebook.com/lifeworldwomen
Twitter: https://twitter.com/LWWEasyNailArt
Pinterest: http://www.pinterest.com/ildikomohos/

Music by Kevin MacLeod /Dark Fog/
http://incompetech.com/music/royalty-free/