8/17/2015

Elegant Rainbow French Manicure


Hi Guys!

Today's nail art that I've made is an elegant rainbow design.

Need only a small sponge and the colors of rainbow.

Let's start it!


1. Apply base coat to protect your natural nails from discoloration,

2. Fix a French manicure tape over your nail:


3. Take a small sponge and paint the colors over it:


4. Draw the rainbow tip carefully over your nail:


5. Remove the tape and repair the edge by a brush and nail polish removal:


6. Finally apply top coat - I used a sparkly polish to make it elegant:


That's it! We're done :)

Please feel free to share your opinion about my nail designs even ask me anything you like to know.


What I use:

1. Essence base coat,

2. Miss Sporty: light blue, green, yellow and pastel purple nail polishes,

3. Astor red nail polish,

4. Essence yellow nail polish,

5.Essence QuickDry top coat.


Thanks for visiting my blog!

Please join me!
Welcome to my:

YouTube: https://www.youtube.com/user/LifeWorldWomen
Facebook: https://facebook.com/lifeworldwomen
Twitter: https://twitter.com/LWWEasyNailArt
Pinterest: http://www.pinterest.com/ildikomohos/

Music by Kevin MacLeod /Easy Lemon/
http://incompetech.com/music/royalty-free


8/14/2015

Dry Brush Nail Art In Pink & White


For my opinion the summer is the best period to use many pink, so I've made a dry brush nail art in pink and white.

Don't want to talk much as usually, let's begin!


1. Apply base coat to protect your natural nails from discoloration,

2. Paint your nails:

- Pink: thumb- and little finger nails,
- Baby pink: index nail,
- White: middle- and ring finger nails.

3. First we need the baby pink polish that I paint from up to down - but before start it dry the brush:


The baby pink won't be so visible it gives a kind of shade to the upper pink..

4. Grab the pink nail polish and go on by pulling the brush across now:


5. We paint the thumb nail by the same way but only color we use the white:


6. Over the baby pink nail put pink dots, over the little finger nail put baby pink dots:


7. Finally apply top coat:


That's it! We're done..

Hope you like this pretty design :)


What I use:

1. Essence base coat,

2. Lovely Summer Trend pink and baby pink nail polishes; Classic white nail polish,

3. Essence QuickDry top coat.


Thanks for visiting my blog!

Join me... Welcome to my:

YouTube: https://www.youtube.com/user/LifeWorldWomen
Facebook: https://facebook.com/lifeworldwomen
Twitter: https://twitter.com/LWWEasyNailArt
Pinterest: http://www.pinterest.com/ildikomohos/

Music by Kevin MacLeod /Clear Air/
http://incompetech.com/music/royalty-free


8/12/2015

Elegant Colorful Mosaic Nail Art


I'm bringing today a colorful and elegant mosaic nail design.

I use pastel pink as basic color for my each nail the mosaic pattern is over the middle- and ring finger nails.

Let's begin!


1. Apply base coat to protect the natural nails,

2. Paint each nail pastel pink,

3. Then we can start the mosaic design - I use light pink, a darker pastel green, pink, dark purple and pastel yellow nail polishes:


I begin by using the light blue then continue with the green...


I suggest you to do slowly because by this way you can avoid the painting of your skin around :)


4. Needs now a gold liner polish or a gold nail polish and a nail art brush for decoration:


5. Finally apply top coat:


That's it!

Done :)


What I use:

1. Essence base coat,

2. Moyra pastel pink nail polish,

3. Miss Sporty dark purple, light blue and pastel green nail polishes,

4. Essence pastel yellow nail polish,

5. Lovely Summer Trend pink nail polish,

6. ADEN gold liner polish,

7. Essence QuickDry top coat.


Thanks for visiting my blog!

Join me... Welcome to my:

YouTube: https://www.youtube.com/user/LifeWorldWomen
Facebook: https://facebook.com/lifeworldwomen
Twitter: https://twitter.com/LWWEasyNailArt
Pinterest: http://www.pinterest.com/ildikomohos/

Music by Kevin MacLeod /Finding the Balance/
http://incompetech.com/music/royalty-free


8/10/2015

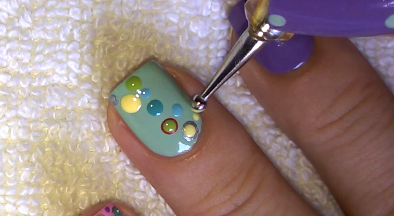
Dotting Tool Nail Art With Multicolor Dots


Today's nail art is a super colorful dotticure nail art that needs three-sized dotting tool and some colors of nail polish.

Let me show you how to do it! :)


1. Apply base coat to protect the natural nails from discoloration,

2. Paint your nails:

- Pastel purple: Thumb-, index- and little finger nails / That not looks pastel on the picture even in the video, maybe the much light turns the shade of color /

- Pastel green: middle finger nail,

- Baby pink: ring finger nail.

3. We need now a big headed dooting tool, a medium and a small one... You see I put two and three dots on the top of each other and paint single ones as well...

Important! Wait some minutes between two layers always! Let the under dot dry a little.


You see on the pictures how I paint the colors how I match them.

4. The 'empty' nails get two dots up and down... Little finger nails get baby pink, the index- and thumb nails get pastel green dots:


5. Finally apply top coat:


That's it! We're done :)

Hope you liked this multicolor dot design.

Please feel free to ask me anything you like to know!


What I use:

1. Essence base coat,

2. Essence pastel yellow nail polish,

3. Maybelline pastel green nail polish,

4. Catrice Nickel Minaj /silver/ nail polish,

5. Lovely Summer Trend baby pink nail polish,

6. Miss Sporty green, light green, light blue, pastel purple and pink nail polishes,

7. Essence QuickDry top coat.


Thanks for stopping at my blog!

Join me!
Welcome to my:

YouTube: https://www.youtube.com/user/LifeWorldWomen
Facebook: https://facebook.com/lifeworldwomen
Twitter: https://twitter.com/LWWEasyNailArt
Pinterest: http://www.pinterest.com/ildikomohos/

Music by Kevin MacLeod /Porch Swing Days - faster/
http://incompetech.com/music/royalty-free


8/07/2015

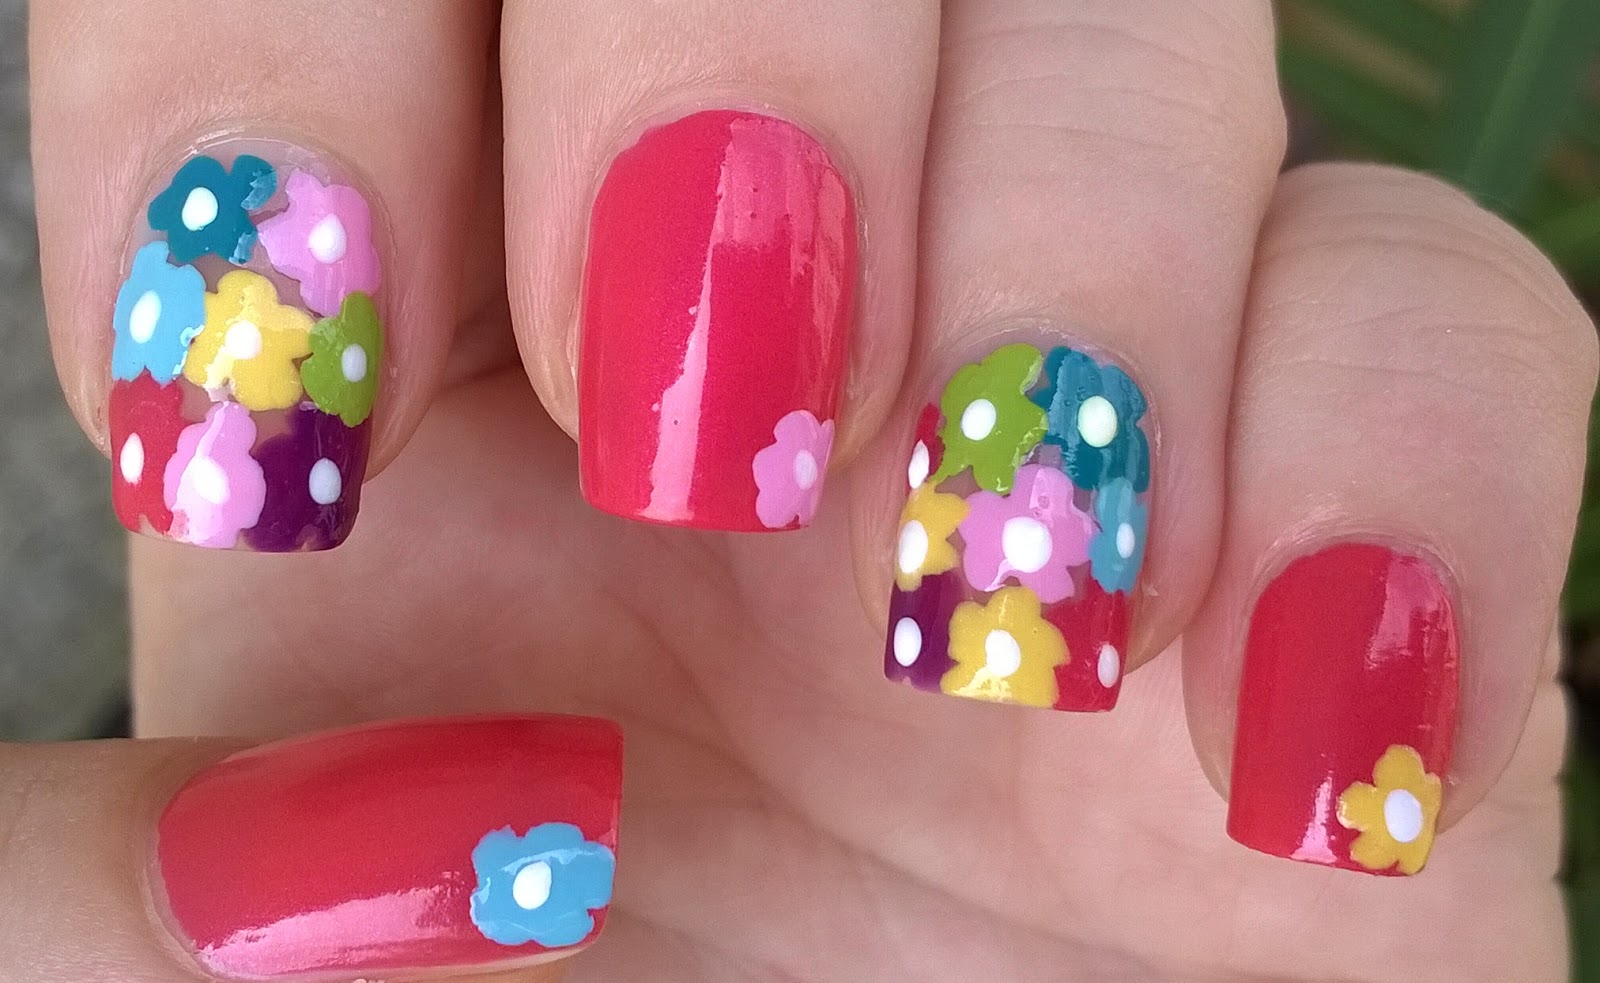
Super Colorful NoTools Needed Floral Nail Art


Hi Guys!

Today's nail art is a super colorful floral design and it no needs any tools.

So, let me show you how to do these easy nails!


1. Apply base coat to protect the natural nails from discoloration,

2. Paint your thumb-, middle- and little finger nails pink,

3. Take some of your nail polishes and start the flowers:


I use: baby pink, pink, yellow, light blue and green, purple and a kind of greenish blue.

4. Each pink nail gets a flower as well:


5. By white nail polish drop small points over the flowers - but carefully, we no need much polish on the brush!


6. Finally apply top coat:


That's it! We're done :)

Let me know how you like this 'no tools' design... Feel free to ask me anything you'd like to know!


What I use:

1. Essence base coat,

2. Miss Sporty pink, purple, light blue and green nail polishes,

3. Lovely white and baby pink nail polishes,

4. Rimmel yellow and greenish blue nail polishes,

5. Essence QuickDry top coat.


Thanks for visiting my blog!

Join me....Welcome to my:

YouTube: https://www.youtube.com/user/LifeWorldWomen
Facebook: https://facebook.com/lifeworldwomen
Twitter: https://twitter.com/LWWEasyNailArt
Pinterest: http://www.pinterest.com/ildikomohos/

Music by Kevin MacLeod /Daily Beetle/
http://incompetech.com/music/royalty-free


8/05/2015

Matte White Nail Design With Colorful Feathers


Hi Guys!

Today I've created a super easy white matte nail design.
That's a white nail art but the feathers make it so colorful.

Let's begin this cute design!


1. Apply base coat to protect the natural nails from discoloration,

2. Paint your nails matte white - I use matte white polish but you can use white nail polish plus matte top coat,

3. We now need a simple nail art brush and some colors for the feathers... Pink, baby pink, yellow, light blue and over the thumb's nail pastel purple:


That's it!
We're already done.

I like to match the matte and shiny parts, the matte base always gives more attention to the upper shiny pattern.


What I use:

1. Essence base coat,

2. Lovely Matte White and Summer Trend baby pink nail polishes,

3. Miss Sporty light blue and pastel purple nail polishes,

4. Rimmel pink and yellow nail polishes.


Thanks for visiting my blog!

Join me!
Welcome to my:

YouTube: https://www.youtube.com/user/LifeWorldWomen
Facebook: https://facebook.com/lifeworldwomen
Twitter: https://twitter.com/LWWEasyNailArt
Pinterest: http://www.pinterest.com/ildikomohos/

Music by Kevin MacLeod /Montauk Point/
http://incompetech.com/music/royalty-free

Sorry but the embed code is missing from YouTube so please click on the link to watch the video :)

8/03/2015

Three Easy Nail Designs In Blue & White


Today I'm bringing three really easy nail ideas by using blue and white nail polishes.

Don't want to waste your time, let's start it!


1. Apply base coat - as always :) - to protect the natural nails.

2. Paint your nails:

- Thumb nail is white,
- The index- and little finger nails are dark blue,
- The middle- and ring fingers nails are light blue.

3. Let's start the abstract pattern over the dark nails - we need a white liner polish or a simple white nail polish and a nail art brush:


4. For the light blue nails we need also the white polish and the dark blue nail polish - it'll be a chevron pattern:


5. The thumb nail needs both of blue colors - we paint a 'V' shape as well using the lines:


6. Finally the top coat:


That's it! We're done :)

Hope you liked these easy designs.


What I use:

1. Essence base coat,

2. Essence light blue nail polish,

3. Crystal Nails dark blue nail polish,

4. Lovely white nail polish,

5. ADEN white liner polish,

6. Essence QuickDry top coat.


Thanks for visiting my blog!

Join me... Welcome to my:

YouTube: https://www.youtube.com/user/LifeWorldWomen
Facebook: https://facebook.com/lifeworldwomen
Twitter: https://twitter.com/LWWEasyNailArt
Pinterest: http://www.pinterest.com/ildikomohos/

Music by Kevin MacLeod /I Feel You/
http://incompetech.com/music/royalty-free