3/11/2015

Colorful floral nail art by using toothpick


Cute rose nails for Spring even Summer!

This light blue is a great choice for the sunny seasons, and these beautiful colors for roses...

Let's start it!

Never miss the base coat if you have natural nails, it protects from discoloration.

- I apply light blue nail polish on my each nail.

- I take the white polish and put a spot for the flower:


- I grab a toothpick and make the rose:


- Finally I paint a smaller rose on the underside without white polish:


And we've done this cute floral nail design!


I'm excited for you to see and try it out :)


What I use:

1. Essence base coat,

2. Rimmel light blue and pink nail polish,

3. Crystal Nails white nail polish,

4. Lovely pink nail polish,

5. Miss Sporty yellow and violet nail polish.


Thank you for visiting my blog!


Please join me :)
Welcome to my

YouTube: https://www.youtube.com/user/LifeWorldWomen
Facebook: https://facebook.com/lifeworldwomen
Twitter: https://twitter.com/LWWEasyNailArt
Pinterest: http://www.pinterest.com/ildikomohos/

Music by Kevin MacLeod /Laid Back Guitars/
http://incompetech.com/music/royalty-free


3/09/2015

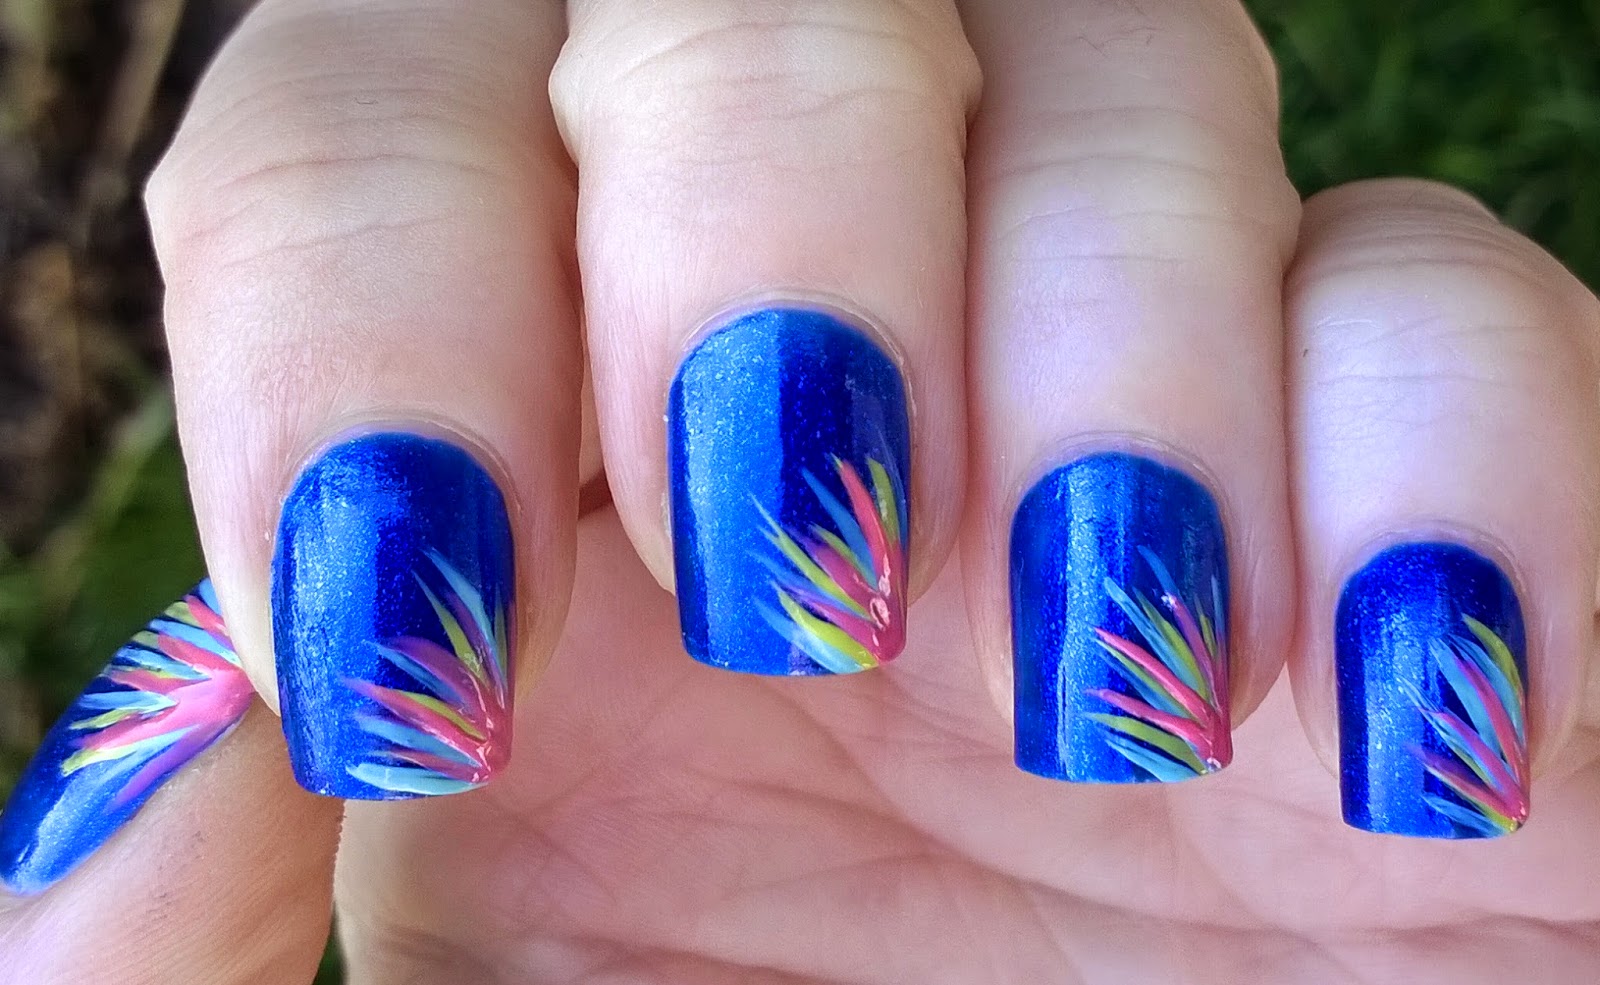
Blue nail art with colorful stripes


Good afternoon!

Today I bring a beautiful blue nail design. I just have seen this nail polish and fell in love! :)

I think this polish is a perfect base of a colorful and cheerful nail art.

Let me show you how I make it!


First I apply base coat to protect my natural nails.

Second step is the blue nail polish.

Then I start to paint the stripes by using first the neon green nail polish:


Then the light blue nail polish:


And finally the pink color:


Now we've finished!

I'm so excited for you too see it :)  Hopefully you'll love this cute design and will try it as soon as possible.


What I use:

1. Essence base coat,

2. Essence Colour&Go sparkly blue nail polish and neon green polish,

3. Miss Sporty light blue nail polish,

4. Moyra pink liner nail polish.


Thank you so much for visiting my blog!


Please join me :)
Welcome to my

YouTube: https://www.youtube.com/user/LifeWorldWomen
Facebook: https://facebook.com/lifeworldwomen
Twitter: https://twitter.com/LWWEasyNailArt
Pinterest: http://www.pinterest.com/ildikomohos/

Music by Kevin MacLeod /Sunshine A./
http://incompetech.com/music/royalty-free


3/06/2015

Simple and pretty two-color dotted nail art


Hi Everyone!

I hope you all having a beautiful day!

Today I made a simple, pure two color nail design. I use a light brown nail polish, a kind of pink polish / we may call it pale purple or mauve / and two sizes dotting tool.

As you see I change colors on my nails, it's more exciting by this way :) .

Let's start this nail art!

First as always I apply base coat to protect natural nails.. Then I paint my nails different colors.

I grab the bigger headed dotting tool and put dots but trying to make different sizes - on brown nails mauve dots and on mauve nails brown dots:


After it's done then may come the smaller dots tops of bigger ones:


Finished!

Always wait some minutes between two coat to avoid smudging.

I really hope you love this design :)


Thanks for visiting my blog!


What I use:

1. Essence base coat,

2. Rimmel light brown nail polish.

3. Essence kind of pink / mauve, pale purple / nail polish.


Please join me :)
Welcome to my

Facebook: https://facebook.com/lifeworldwomen
Twitter: https://twitter.com/LWWEasyNailArt
Pinterest: http://www.pinterest.com/ildikomohos/

Music by Kevin MacLeod /Dream Culture/
http://incompetech.com/music/royalty-free

3/04/2015

Colorful spring flower nail art


Hey there!

Today the sun was shining so fine and it brought out of me this cute and happy design.

I use four colors such as white, pink, dark pink and yellow; and two sizes of dotting tool.

Let me show you now this nail art:

First of all I apply the base coat. Then I paint my nails by using different colors.

I start to make the flowers or half flowers :) :


First I use the bigger headed dotting tool and then on the top the small headed tool.

After it making some yellow dots alongside on upper edge of nails:


And finally big yellow dots in the middle of flowers:


Never forget to wait at least some minutes between two colors / two coats, by this we you avoid the smudging :) .

So, I hope you'll try this design out.


What I use:

1. Essence base coat,

2. Crystal Nails white nail polish,

3. NYC dark pink nail polish,

4. Lovely pink nail polish,

5. Miss Sporty yellow nail polish.


Thanks alot for visiting my blog!

Hopefully I can help you all how to paint easy and cute nail designs.


Please join me :)
Welcome to my

YouTube channel: https://www.youtube.com/user/LifeWorldWomen
Facebook: https://facebook.com/lifeworldwomen
Twitter: https://twitter.com/LWWEasyNailArt
Pinterest: http://www.pinterest.com/ildikomohos/

Music by Kevin MacLeod /Deliberate Thought/
http://incompetech.com/music/royalty-free


3/02/2015

Grey, black and silver glitter nail design


Another elegant and easy nail art by using grey, black and silver glitter nail polish; and a small headed dotting tool.

I think these colours are perfect for weekdays even for celebrations.

So, let's start this nail art:

First of all I apply base coat to protect my natural nails from discoloration - Do it as well for natural nails!

Then I paint my each nail with grey nail polish.

Next step is drawing of black stripes:


Finally put some glitter dots alongside next to the stripes:


And we've done it!

I hope you love it and will try it out. :)


Thank you for visiting my blog and hopefully I can help by my ideas.


What I use:

1. Essence base coat,

2. Crystal Nails grey nail polish,

3. Essence silver glitter nail polish /Sparkle Sand Effect/,

4. ADEN black liner nail polish.


Please join me :)
Welcome to my

Facebook: https://facebook.com/lifeworldwomen
Twitter: https://twitter.com/LWWEasyNailArt
Pinterest: http://www.pinterest.com/ildikomohos/

Music by Kevin MacLeod /Dream Culture/
http://incompetech.com/music/royalty-free


2/27/2015

Pastel pink nail art with dotting tool design


Good afternoon!

Today I bring a cute and I think really nice and easy nail art.

I applied only three colors and a small headed dotting tool.

Let me show you how I do this!


First of all I apply base coat to protect the natural nails then two coats of pastel pink nail polish.

And I start to paint the flower and the dots decoration:


We've done guys!

You see it's really nice and easy to do... I hope you'll try it.


What I use:

1. Essence base coat,

2. Moyra pastel pink and white nail polish,

3. Rimmel pink nail polish.


Thank you so much for visiting my blog!


Please join me :)
Welcome to my

Facebook: https://facebook.com/lifeworldwomen
Twitter: https://twitter.com/LWWEasyNailArt
Pinterest: http://www.pinterest.com/ildikomohos/

Music by Kevin MacLeod /Autumn Day/
http://incompetech.com/music/royalty-free


2/25/2015

Gold and dark blue nail art for 2015 without tools


What I created today is a metallic gold and dark blue nail design, which is one of nail trends for 2015.

It looks hard to do but actually it isn't :).

So let's start this trendy nail art!

First step is the base coat - as always - for protecting natural nails from discoloration.

Next step we apply the sparkly gold polish - but don't need it on the whole nail:


If we did it than may comes the blue coat top of the gold coat:


And already done!

I really love this design and I hope you'll try it then see how it's cute and easy.


What I use:

1. Essence base coat,

2. Moyra sparkly metallic gold nail polish,

3. Crystal Nails dark blue nail polish.


Thank you so much for visiting my blog!


Please join me :)
Welcome to my

Facebook: https://facebook.com/lifeworldwomen
Twitter: https://twitter.com/IldikoMohos
Pinterest: http://www.pinterest.com/ildikomohos/

Music by Kevin MacLeod /Montauk Point/
http://incompetech.com/music/royalty-free