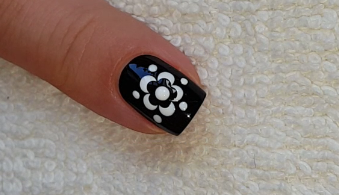
Today I show you five easy black and white nail art designs using dotting tool.
Let's do it!
1. Apply base coat to protect your natural nails,
2. Paint your little nail black and don't let it dry, then put white blobs over it with a big dotting tool:
3. Paint your ring nail black and let it dry:
4. Paint the right side of the middle nail black and also let it dry:
5. Paint the index and thumb nails black and let them dry:
6. Back to the ring nail: Paint messy white tip then put white dots with a big dotting tool as I do:
7. Paint the other side of the middle nail black:
8. Paint black dots alongside in the middle with a big dotting tool:
9. Now start to paint the flower design over the index nail by using big and small dotting tools:
10. The thumb nail has wavy white French tip:
11. We still need some small black dots over the ring nail design:
12. Back to the middle nail: Paint small black points over the white side and small white point over the black side:
13. Back to the index nail: Paint medium black dots on the top of the white ones:
14. Then a white dot in the middle of the flower:
15. Finish the nail art with top coat to protect the manicure from peeling and to keep it shiny and glossy:
What I use:
1. Essence base coat,
2. Essence black and white nail polishes,
3. Sally Hansen Insta-Dri top coat,
4. Dotting tools.
Thanks for stopping by my blog!
Come and join me,
Welcome to my:
YouTube channel: https://www.youtube.com/user/LifeWorldWomen
Feel free to ask me anything you'd like to know!
Instagram: https://www.instagram.com/ildikonailart/
Facebook: https://facebook.com/lifeworldwomen
Twitter: https://twitter.com/LWWEasyNailArt
Pinterest: http://www.pinterest.com/ildikomohos/
Music by Kevin MacLeod /Montauk Point, Sunshine A./
https://incompetech.com/music/royalty-free/
Licensed under Creative Commons: By Attribution


No comments:
Post a Comment