Today I am here with a greyish green nail art with dry marble flower design.
Let me show you this nail art step by step!
First apply base coat to protect your natural nails:

Apply greyish green nail polish over one of your nails. We need wet polish! You may use grey or green nail polish as well.

Place 3 pink medium blobs over the wet base, and 3 small baby pink blobs over the pink ones:


With a needle shape heart-like petals:

Still we need 3 small black points above the petals:

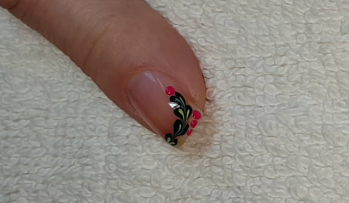
Apply top coat to protect the manicure from peeling and to keep it shiny and glossy:

What I use:
1. Essence Pro White Active base coat,
2. Essence black, baby pink and greyish green nail polishes,
3. P2 pink polish,
4. Essence 3D Shine top coat,
5. Dotting tool,
6. Sewing needle.
Thanks for stopping by my blog!
Come and join me,
Welcome to my:
YouTube channel: https://www.youtube.com/user/LifeWorldWomen
Feel free to ask me anything you'd like to know!
Instagram: https://www.instagram.com/ildikonailart/
Facebook: https://facebook.com/lifeworldwomen
Twitter: https://twitter.com/LWWEasyNailArt
Pinterest: http://www.pinterest.com/ildikomohos/
Music by Kevin MacLeod /Continue Life/
https://incompetech.com/music/royalty-free/
Licensed under Creative Commons: By Attribution