Showing posts with label grey nail designs. Show all posts

11/14/2018

Dark Grey Based Striped Nail Art


Today's manicure is a dark grey based striped nail art.

Let's begin!


1. Apply base coat to protect your natural nails,

2. Paint your nails dark grey and let them dry:


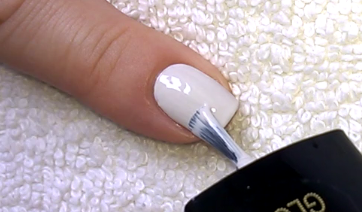
3. We can fix the edge with a nail art brush and nail polish remover:


4. For the striped pattern we need:

- striping brush,
- sparkly red nail polish,
- pink and 
- light pink polishes /I use sparkly ones/:


5. Finish the nail art with top coat to protect the manicure from peeling and to keep it shiny and glossy:


What I use:

1. Essence Pro White Active base coat,

2. Essence All That Greys dark grey nail polish,

3. P2 Volume Gloss gel look sparkly red polish,

4. Lovely sparkly pink nail polish,

5. Essence Glow & Care sparkly light pink polish,

6. Essence 3D Shine gel look top coat,

7. Striping brush.


Thanks for stopping by my blog!

Come and join me,
Welcome to my:

YouTube channel: https://www.youtube.com/user/LifeWorldWomen

Feel free to ask me anything you'd like to know!

Instagram: https://www.instagram.com/ildikonailart/
Facebook: https://facebook.com/lifeworldwomen
Twitter: https://twitter.com/LWWEasyNailArt
Pinterest: http://www.pinterest.com/ildikomohos/

Music by Kevin MacLeod  /Dream Culture/
https://incompetech.com/music/royalty-free/

Licensed under Creative Commons: By Attribution


1/11/2017

Grey Needle & Toothpick Marble Nail Art With Flower Design


I'm bringing a grey nail art today. I used needle and toothpick for this marble flower design.

Let me show you this step by step.


1. Apply base coat to protect your natural nails,

2. Paint your middle, ring and thumb nails light grey - We need two coats and the second one should be wet when we start the marbling:


3. Put two dark grey blobs over the wet base:


4. By a needle start to make the flowers:


5. The index and little nails are dark grey and also needed two coats:


6. By a toothpick paint small black points next to the flowers:


7. Then by a cut toothpick make a bit bigger light grey dots alongside over the dark nails:


8. Make nice edge by nail polish remover and nail brush:


9. Finally apply top coat to protect your manicure from peeling and to keep it shiny and glossy:


What I use:

1. Essence base coat,

2. Essence 'All The Greys' light and dark grey nail polishes,

3. Lovely black polish,

4. Sally Hansen Double Duty base&top coat,

5. Needle, toothpick.


Thank you for stopping by my blog!

Come and join me:

YouTube channel: https://www.youtube.com/user/LifeWorldWomen

Feel free to ask me anything you'd like to know!

Instagram: https://www.instagram.com/ildikonailart/
Facebook: https://facebook.com/lifeworldwomen
Twitter: https://twitter.com/LWWEasyNailArt
Pinterest: http://www.pinterest.com/ildikomohos/

Music by Kevin MacLeod /Dream Culture/
https://incompetech.com/music/royalty-free/

Licensed under Creative Commons: By Attribution


10/12/2016

Dark Grey Based Needle Floral Nail Art Idea


Hello Everyone!

Today I share a nail art what I made for request.

I already have a similar design over white base. The request was for doing it over dark base, so I chose the dark grey.

Let me show you the steps!


1. Apply base coat to protect your natural nails,

2. Paint one of your nails dark grey.. We need wet nail polish:


3. We need colorful nail polishes, such as:

- pink,
- light orange,
- yellow,
- peach,
- purple,
- blue.

I use big dotting tool at first:


Have to work quick Guys!

4. Then I use medium dotting tool to put the smaller dots on the top of bigger ones:


5. Grab a needle and start to make the floral motif:


6. The nail polsih is still wet a little, so I place a black rhinestone over the flower:


7. Finally I paint three small mint green points:


8. At the end apply top coat to protect your manicure from peeling and to keep it shiny and glossy:


That's it! We're done.


What I use:

1. Essence base coat,

2. Essence dark grey nail polish,

3. Essence light orange, peach, purple, yellow and mint green polishes,

4. Rimmel Salon Pro pink nail polish,

5. Lovely blue nail polish,

6. Sally Hansen Double Duty base&top coat,

7. Dotting tools,

8. Needle.


Thanks alot for stopping by my blog!

Come and join me,
Welcome to my:

YouTube channel: https://www.youtube.com/user/LifeWorldWomen

Feel free to ask me anything you'd like to know!

Instagram: https://www.instagram.com/ildikonailart/
Facebook: https://facebook.com/lifeworldwomen
Twitter: https://twitter.com/LWWEasyNailArt

Pinterest: http://www.pinterest.com/ildikomohos/

Music by Kevin MacLeod /Finding The Balance/
https://incompetech.com/music/royalty-free/

Licensed under Creative Commons: By Attribution


10/10/2016

Little Squares Nail Art


Hello Everyone!

This is the first time I use this technique. I paint colored spots over a foil and dry them there..

Let's start it!


1. So, I paint:

- pink,
- light orange,
- yellow spots over a folder foil... I don't know its English name sorry, we use it for documents :))) .... . You may see greenish blue too but I didn't use it finally:


Needed at least two layers... the thicker is better to remove...

2. Apply top coat over the colors (I recommend the quick dry top coat, I used regular one and had to wait about 1,5 hours but the spots were not fully dried yet):


3. Paint your nails dark grey and let them dry:


4. Remove the nail polish spots carefully then cut small squares (the orange squares are a bit bigger):


5. I fix the squares by top coat:


6. Finally apply top coat to protect your manicure from peeling and to keep it shiny and glossy:


That's it! We're done.


What I use:

1. Essence base coat,

2. Essence dark grey nail polish,

3. Rimmel pink polish,

4. Essence yellow and light orange nail polishes,

5. Sally Hansen Double Duty base&top coat,

6. Folder (foil).


Thanks alot for stopping by my blog!

Come and join me,
Welcome to my:

YouTube channel: https://www.youtube.com/user/LifeWorldWomen

Feel free to ask me anything you'd like to know!

Instagram: https://www.instagram.com/ildikonailart/
Facebook: https://facebook.com/lifeworldwomen
Twitter: https://twitter.com/LWWEasyNailArt

Pinterest: http://www.pinterest.com/ildikomohos/

Music by Kevin MacLeod /Autumn Day/
https://incompetech.com/music/royalty-free/

Licensed under Creative Commons: By Attribution


7/22/2016

Ikat Inspired Toothpick Nail Art


Hello Everyone!

In this day I show you a no special tool needed ikat inspired toothpick nail art.

I don't paint so much grey design, so I used grey base for now.

Let's do it!


1. Apply base coat to protect your natural nails from hard discoloration,

2. Paint your nails grey then let them dry:


3. For the pattern I use a toothpick, black, pink and light grey nail polishes... I start it with thhe black polish:


4. Then I apply pink next to the black:


5. I paint the middle part light grey:


6. I apply silver nail polish around the ikat-like pattern:


7. Finally may come the top coat, to protect the manicure from peeling and to keep it shiny and glossy:


That's it! We're done.


What I use:

1. Essence Ultra Nail Repair base coat,

2. Catrice black nail polish,

3. Essence grey, light grey, silver and pinkish red nail polishes,

4. Sally Hansen Double Duty base&top coat,

5. Toothpick.


Thanks for stopping by blog!

Come and join me,
Welcome to my:

YouTube: https://www.youtube.com/user/LifeWorldWomen

Feel free to ask me anything you'd like to know!

Facebook: https://facebook.com/lifeworldwomen
Twitter: https://twitter.com/LWWEasyNailArt

Pinterest: http://www.pinterest.com/ildikomohos/

Music by Kevin MacLeod /Double Drift/
https://incompetech.com/music/royalty-free/

Licensed under Creative Commons: By Attribution


6/10/2016

Elegant Grey Bracelet Nail Art Design Using Sewing Threads


Hello Everyone!

Today's nail design is an elegant grey bracelet nail art using sewing threads.

Hope you'll like this cute new trend.

Let's begin this pretty design!


1. Apply base coat to protect your natural nails from hard discoloration,

2. Paint your nails:

- Dark grey: ring and little nails,
- Medium grey: middle nail,
- Light grey: index and thumb nails:


3. Paint small silver dots alongside diagonally over each nail:


4. For the bracelet design we need light grey and black sewing threads - I cut them before using:


5. For fixing the threads use top coat:


6. I still put a pearl-like nail decoration and a rhinestone over the bracelet nails:


7. Finally apply top coat to protect the manicure from peeling and to keep it shiny and glossy:


That's it! We're done.


What I use:

1. Essence ultra nail repair base coat,

2. Essence High Gloss 'All That Greys' nail polishes / Three shades of grey,

3. Catrice silver nail polish,

4. Sally Hansen Double Duty base&top coat,

5. Grey and black sewing threads,

6. Dotting tool,

7. Nail decorations.


Thanks for stopping by my blog!

Come and join me,
Welcome to my:


Feel free to ask me anything you'd like to know!


Music by Kevin MacLeod /Finding The Balance/

Licensed under Creative Commons: By Attribution