Showing posts with label Halloween. Show all posts

10/23/2024

Spooky Glitter Eyes Halloween Nail Art


Apply base coat to protect your natural nails,

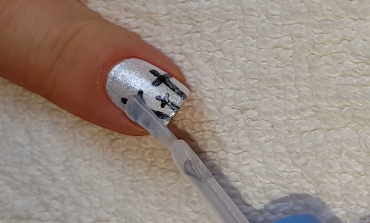
Paint your nails black and let them dry.

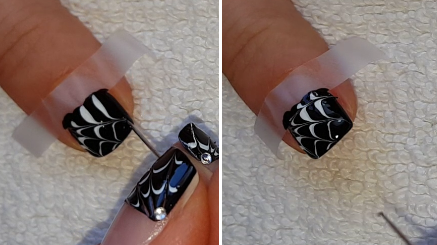
Paint 2 white big dots next to each other, then 2 small black dots on the top of the white ones.

Add bluish silver glitter polish dots to the black dots.

Apply top coat to protect your manicure from peeling and to keep it shiny and glossy.


Products I use:


- Essence base coat,

- OPI white nail polish,

- Essence black nail polish,

- Miss Sporty sparkle touch glitter polish,

- Rimmel top coat,

- Dotting tools.


Thanks for stopping by my blog!

Please watch the nail art tutorial video on my YouTube channel.


Come and join me,
Welcome to my:

YouTube channel: https://www.youtube.com/user/LifeWorldWomen


Feel free to ask me anything you'd like to know!

Instagram: https://www.instagram.com/ildikonailart/
Facebook: https://facebook.com/lifeworldwomen
Pinterest: http://www.pinterest.com/ildikomohos/


Music by Kevin MacLeod /Moonlight Hall/
https://incompetech.com/music/royalty-free/


https://www.youtube.com/watch?v=yMr3Wk6099M

10/26/2023

Halloween Spider Nail Art


Apply base coat to protect your natural nails,

Paint your little and index nails sparkly purple, your ring nail dark grey.

Add greyish black glitter layer to the grey nail.

Paint your middle nail pastel purple.

With a dotting tool make the spider's body.

Grab a thin nail art brush and paint the legs.

Add black glitter polish to the body.

(I use black acrylic paint).

The thumb nail is optional.

Apply top coat to protect your manicure from peeling and to keep it shiny and glossy.


Products I use:


- Essence Active Whitener base coat,

- Catrice sparkly purple nail polish (69 If Not Purple... Then What?),

- Sally Hansen Xtreme Wear pastel purple nail polish (559 Lacey Lilac),

- Essence All That Greys dark grey nail polish (02 Step Into The Grey Zone),

- Miss Sporty greyish black glitter polish,

- Moyra black acrylic paint,

- Sally Hansen Insta-Dri top coat,

- Dotting tool,

- Thin nail art brush.


Thanks for stopping by my blog!

Please watch the nail art tutorial video on my YouTube channel.


Come and join me,
Welcome to my:

YouTube channel: https://www.youtube.com/user/LifeWorldWomen


Feel free to ask me anything you'd like to know!

Instagram: https://www.instagram.com/ildikonailart/
Facebook: https://facebook.com/lifeworldwomen
Pinterest: http://www.pinterest.com/ildikomohos/

Music by Audio Library - YouTube  /Micro/


https://www.youtube.com/watch?v=GkaauCVsyR4

10/19/2021

Halloween Black French Manicure


Apply base coat to protect your natural nails:


Paint black French tips:


Make grey color by using white and black acrylic paints:


With a dotting tool paint cloud over the black tip:


With a thin nail art brush paint white star-like motif and tiny dots over the French tip:


I add white and light grey colors to the cloud:


Apply top coat to protect your manicure from peeling and to keep it shiny and glossy:


What I use:


- Essence Active Whitener base coat,

- Essence black nail polish,

- Moyra black and white acrylic paints,

- Essence 3D Effect Gel Look Plumping top coat,

- French manicure stickers,

- Dotting tool,

- Thin nail art brush.


Thanks for stopping by my blog!

Come and join me,
Welcome to my:

YouTube channel: https://www.youtube.com/user/LifeWorldWomen


Feel free to ask me anything you'd like to know!

Instagram: https://www.instagram.com/ildikonailart/
Facebook: https://facebook.com/lifeworldwomen
Twitter: https://twitter.com/LWWEasyNailArt
Pinterest: http://www.pinterest.com/ildikomohos/

Music by Audio Library - YouTube  /Clover_3/


10/26/2016

Shiny Halloween Cemetery Nail Art


Hello Everyone!

Today I made a shiny cemetery Halloween nail art using regular nail polish and acrylic paint.

Let me show you how you can do this white based design!


1. Apply base coat to protect your natural nails,

2. Paint your nails white and let them dry:


3. By a thin nail art brush and black acrylic paint start to paint the pattern - I make headstones and crosses:


I make little changes on each nail:


4. For the next step I use a soft glitter polsih, called 'Frozen kiss' - Try to put the most polish over the upper side and less over the lower side:


5. At the end may come the top coat to protect the manicure from peeling and to make it shiny and glossy:


That's it! We're done.


What I use:

1. Essence base coat,

2. Essence white nail polish and glitter (Frozen kiss) nail polsih,

3. Moyra black acrylic paint,

4. Sally Hansen Double Duty base&top coat,

5. Nail art brush.


Thanks alot for stopping by my blog!

Come and join me!
Welcome to my:

YouTube channel: https://www.youtube.com/user/LifeWorldWomen

Feel free to ask me anything you'd like to know!

Instagram: https://www.instagram.com/ildikonailart/
Facebook: https://facebook.com/lifeworldwomen
Twitter: https://twitter.com/LWWEasyNailArt

Pinterest: http://www.pinterest.com/ildikomohos/

Music by Kevin MacLeod /Anamalie/
https://incompetech.com/music/royalty-free/

Licensed under Creative Commons: By Attribution


10/19/2016

Halloween Drag Marble Spider Web French Manicure


Hello Everyone! :)

Today I show you a needle nail art for Halloween.
I make black French tips with white spider web design using Scotch tape.


1. Apply base coat to protect your natural nails,

2. Fix the tape over your nail for the black tip - Do one nail at the same time because we need wet nail polish... Then make the French tip:


3. Paint curved lines over the wet base - I use striping nail polish:


4. Grab a needle and start to make the spider web:


5. Remove the tape carefully:


6. The polish is still wet, so fix a rhinestone in the corner of the web:


7. Finally apply top coat to protect your manicure from peeling and to keep it shiny and glossy:


That's it! We're done.


What I use:

1. Essence Pro White Active base coat,

2. Sally Hansen Miracle gel black polish,

3. ADEN white striping polish,

4. Sally Hansen Double Duty base&top coat,

5. Scotch tape,

6. Needle,

7. Rhinestone.


Thanks alot for reading my blog!

Come and join me,
Welcome to my:

YouTube channel: https://www.youtube.com/user/LifeWorldWomen

Feel free to ask me anything you'd like to know!

Instagram: https://www.instagram.com/ildikonailart/
Facebook: https://facebook.com/lifeworldwomen
Twitter: https://twitter.com/LWWEasyNailArt

Pinterest: http://www.pinterest.com/ildikomohos/

Music by Kevin MacLeod /Pilot Error/
https://incompetech.com/music/royalty-free/

Licensed under Creative Commons: By Attribution


10/17/2016

Black & Pink-Orange Ombre Halloween Nail Art


Hello Everyone!

Today's nail art is a black and pink-orange ombre Halloween nail design.

This design needs a bit more time but this is an easy nail art.

Let's start it!


1. Apply base coat,

2. Paint your middle and ring nails pink, the other nails are black:


3. We can fix the edge by a nail art brush and nail polish remover:


4. For the ombre design we need a small sponge and ornage nail polish:


5. If needed put a bit pink polish too:


6. Now we can start to paint the houses, by using a thin nail art brush and black acrylic paint:


I paint different houses..


7. For the windows I use white paint too:


We can fix the windows by black paint:


8. Over the black nails I paint double crosses:


9. Finally may come the top coat to protect the manicure from peeling and to keep it shiny and glossy:


That's it! We're done.


What I use:

1. Essence base coat,

2. Catrice black nail polish,

3. Rimmel pink nail polish,

4. Maybelline ColoRama orange nail polish,

5. ADEN white striping polish,

6. Moyra black and white acrylic paints,

7. Sally Hansen Double Duty base&top coat,

8. Makeup sponge,

9. Nail art brush.


Thanks for stopping by my blog!

Come and join me,
Welcome to my:

YouTube channel: https://www.youtube.com/user/LifeWorldWomen

Feel free to ask me anything you'd like to know!

Instagram: https://www.instagram.com/ildikonailart/
Facebook: https://facebook.com/lifeworldwomen
Twitter: https://twitter.com/LWWEasyNailArt
Pinterest: http://www.pinterest.com/ildikomohos/

Music by Kevin MacLeod /I Feel You/
https://incompetech.com/music/royalty-free/

Licensed under Creative Commons: By Attribution