11/15/2017

Easy Blue Based Dotting Tool Nail Art Idea


Today I'm bringing a light blue based easy dotting tool nail art.


1. Apply base coat to protect your natural nails,

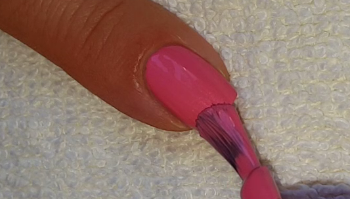
2. Paint your nails light blue and let them dry:


3. Paint a white line and a black one:


4. With a small dotting tool paint blue and pink dots around the lines:


5. Finish the nail art with top coat to protect the manicure from peeling and to keep it shiny and glossy:


What I use:

1. Essence base coat,

2. Essence light blue nail polish,

3. Miss Sporty pink polish,

4. Essence medium blue nail polish,

5. ADEN black and white striping polish,

6. Sally Hansen Double Duty base&top coat,

7. Dotting tool.


Thanks for stopping by my blog!

Come and join me,
Welcome to my:

YouTube channel: https://www.youtube.com/user/LifeWorldWomen

Feel free to ask me anything you'd like to know!

Instagram: https://www.instagram.com/ildikonailart/
Facebook: https://facebook.com/lifeworldwomen
Twitter: https://twitter.com/LWWEasyNailArt
Pinterest: http://www.pinterest.com/ildikomohos/

Music by Kevin MacLeod  /Continue Life/
https://incompetech.com/music/royalty-free/

Licensed under Creative Commons: By Attribution


11/13/2017

Blue & White Easy Dry Marble Needle Nail Art


Today I'm bringing a white based blue dry marble nail art design.

Let's start it!


1. Apply base coat to protect your natural nails,

2. Paint one of your nails white - We need wet polish!


3. We need blue nail polish for the blobs - I use spakle blue and ocean blue nail polishes:


4. With a needle start to make the marble pattern:


5. If needed fix the edge by using a nail art brush and nail polish remover:


6. Apply top coat to protect your manicure from peeling and to keep it shiny and glossy:


What I use:

1. Essence base coat,

2. Essence white nail polish,

3. Crystal Nails ocean blue nail polish,

4. Lovely sparkle blue nail polish,

5. Sally Hansen Double Duty base&top coat,

6. Needle.


Thanks for stopping by my blog!

Come and join me,
Welcome to my:

YouTube channel: https://www.youtube.com/user/LifeWorldWomen

Feel free to ask me anything you'd like to know!

Instagram: https://www.instagram.com/ildikonailart/
Facebook: https://facebook.com/lifeworldwomen
Twitter: https://twitter.com/LWWEasyNailArt
Pinterest: http://www.pinterest.com/ildikomohos/

Music by Kevin MacLeod /Sunshine A./
https://incompetech.com/music/royalty-free/

Licensed under Creative Commons: By Attribution


11/10/2017

Sparkle Blue Based Flower Nail Art


Today I'm bringing a sparkle blue based flower nail art.

Let's start it!


1. Apply base coat to protect your natural nails,

2. Fix French manicure sticker over the nail and paint it sparkle blue ( I use blue holographic nail polish ):


3. Remove the sticker:


4. Paint light blue and pastel purple flowers by using a small dotting tool:


5. Around the flowers paint small point by using the same colors:


6. Paint purple dot in the middle of the blue flower and blue dot in the middle of the purple flower:


7. Apply top coat to protect your manicure from peeling and to keep it shiny and glossy:


What I use:

1. Essence base coat,

2. Essence pastel purple nail polish,

3. NYC light blue nail polish,

4. Essence 'Out Of Space Stories' sparkle blue holographic nail polish,

5. Sally Hansen Double Duty base&top coat,

6. French manicure stickers,

7. Dotting tool.


Thanks for stopping by my blog!

Come and join me,
Welcome to my:

YouTube channel: https://www.youtube.com/user/LifeWorldWomen

Feel free to ask me anything you'd like to know!

Instagram: https://www.instagram.com/ildikonailart/
Facebook: https://facebook.com/lifeworldwomen
Twitter: https://twitter.com/LWWEasyNailArt
Pinterest: http://www.pinterest.com/ildikomohos/

Music by Kevin MacLeod /Dream Culture/
https://incompetech.com/music/royalty-free/

Licensed under Creative Commons: By Attribution


11/08/2017

Purple Negative Space Scotch Tape Nail Art


Today I'm bringing a negative space nail art in purple shades.


1. Apply base coat to protect your natural nails,

2. Fix a piece of Scotch tape over the nail diagonally:


3. Apply two shades of purple over the nail:


4. Remove the tape before the polish gets dry:


5. Fix the edge with a nail art brush and nail polish remover:


6. Apply top coat to protect the manicure from peeling and to keep it shiny and glossy:


What I use:

1. Essence base coat,

2. Essence pastel purple nail polish,

3. Rimmel Salon Pro purple nail polish,

4. Sally Hansen Double Duty base&top coat,

5. Scotch tape.


Thanks for stopping by my blog!

Come and join me,
Welcome to my:

YouTube channel: https://www.youtube.com/user/LifeWorldWomen

Feel free to ask me anything you'd like to know!

Instagram: https://www.instagram.com/ildikonailart/
Facebook: https://facebook.com/lifeworldwomen
Twitter: https://twitter.com/LWWEasyNailArt
Pinterest: http://www.pinterest.com/ildikomohos/

Music by Kevin MacLeod /Clear Waters/
https://incompetech.com/music/royalty-free/

Licensed under Creative Commons: By Attribution


11/06/2017

Black & White Dry Marble Chevron Nails Using Needle


Today I show you a black and white dry marble chevron nail art using needle and Scotch tape.


1. Apply base coat to protect your natural nails,

2. Fix 'V' shape Scotch tape over the nail and paint black tip:


3. Remove the tape slowly and don't let the polish dry:


4. Put white blobs over the wet base:


5. With a needle mix the colors softly:


6. Paint silver line over the edge:


7. Finish the nail art with top coat to protect your manicure from peeling and to keep it shiny and glossy:


What I use:

1. Essence base coat,

2. Essence black and white nail polishes,

3. ADEN silver striping polish,

4. Sally Hansen Insta-Dri top coat,

5. Needle,

6. Scotch tape.


Thanks for stopping by my blog!

Come and join me,
Welcome to my:

YouTube channel: https://www.youtube.com/user/LifeWorldWomen

Feel free to ask me anything you'd like to know!

Instagram: https://www.instagram.com/ildikonailart/
Facebook: https://facebook.com/lifeworldwomen
Twitter: https://twitter.com/LWWEasyNailArt
Pinterest: http://www.pinterest.com/ildikomohos/

Music by Kevin MacLeod /I Feel You/
https://incompetech.com/music/royalty-free/

Licensed under Creative Commons: By Attribution


11/03/2017

Sparkle Blue Dry Marble Floral Nail Art Using Needle & Toothpick


Today's manicure is a sparkle blue marble floral nail art by using needle and toothpick.


1. Apply base coat to protect your natural nails,

2. Paint your middle nail white (the ring nail is the same) and don't let it dry!


3. Put two sparkle blue blobs over the wet base then two light blue blobs on the top:


4. With a needle make flower shapes:


5. The index, little and thumb nails are sparkle blue:


6. Paint small white points in the middle of the flowers by using a toothpick:


7. Finish the nail art with top coat to protect the manicure from peeling and to keep it shiny and glossy:


What I use:

1. Essence base coat,

2. Lovely sparkle blue nail polish,

3. NYC light blue nail polish,

4. Essence white nail polish,

5. Sally Hansen Double Duty base&top coat,

6. Needle,

7. Toothpick.


Thanks for stopping by my blog!

Come and join me,
Welcome to my:

YouTube channel: https://www.youtube.com/user/LifeWorldWomen

Feel free to ask me anything you'd like to know!

Instagram: https://www.instagram.com/ildikonailart/
Facebook: https://facebook.com/lifeworldwomen
Twitter: https://twitter.com/LWWEasyNailArt
Pinterest: http://www.pinterest.com/ildikomohos/

Music by Kevin MacLeod  /Finding The Balance/
https://incompetech.com/music/royalty-free/

Licensed under Creative Commons: By Attribution


11/01/2017

Pink Leopard Nail Art Using Toothpick


Today I'm bringing a toothpick nail art, a pink leopard nail design.


1. Apply base coat to protect your natural nails,

2. Paint your nails light pink or pastel pink and let them dry:


3. Fix the edge by using nail art brush and nail polish remover:


4. Paint little gold spots with a toothpick:


5. Use dark pink polish to paint the leopard pattern:


6. Finish the nail art with top coat to protect the manicure from peeling and to keep it shiny and glossy:


What I use:

1. Essence base coat,

2. Essence Glow&Care shiny pastel/light pink nail polish,

3. Essence dark pink and gold nail polishes,

4. Sally Hansen Insta-Dri top coat,

5. Toothpick.


Thanks for stopping by my blog!

Come and join me,
Welcome to my:

YouTube channel: https://www.youtube.com/user/LifeWorldWomen

Feel free to ask me anything you'd like to know!

Instagram: https://www.instagram.com/ildikonailart/
Facebook: https://facebook.com/lifeworldwomen
Twitter: https://twitter.com/LWWEasyNailArt
Pinterest: http://www.pinterest.com/ildikomohos/

Music by Kevin MacLeod /Laid Back Guitars/
https://incompetech.com/music/royalty-free/

Licensed under Creative Commons: By Attribution